Activate Your Windows XP Internet Firewall
* 1 Ensure that you have the latest updates for Windows XP, including Service Pack 2. Service Pack 2 and the latest automatic updates provide functionality for the Windows XP integrated firewall.
* 2 Click on the "Start" menu button.
* 3 Click on the "Control Panel" selection.
* 4 Click on the "Security Center" link, or click the "Switch to Classic View" link to change the appearance of the control panel.
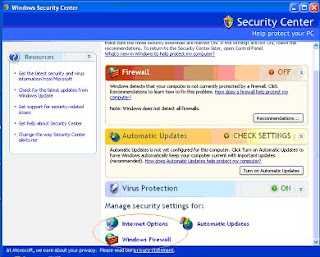
* 5 Examine the settings in the window that opens. The firewall settings will display either on or off. By default they are set to "on," unless you have changed your system settings or activated a firewall from a third-party application.
* 6 Re-enable the Windows firewall by clicking on the "Recommendations" button within the firewall frame. This will bring you to a window in which you can change the settings for the firewall.
* 7 Click the "Enable Now" button to activate the firewall.
* 8 Click "Close" in the window that opens. It's simply a notification to let you know that the firewall has successfully activated.
* 9 Click "OK" to shut the Recommendations window and return to the Settings window.
* 10 Copy and paste file names and links if you need to add them to the firewall exceptions list. This will prevent Windows Firewall from blocking incoming and outgoing Internet traffic that is generated or received by the selected program.
0 comments:
Post a Comment